This guide will walk you through publishing your first website to the Sutty CMS (opens in a new tab).
If you would like to also publish your content on the Fediverse via the Social Inbox, please follow the official guide here (opens in a new tab).
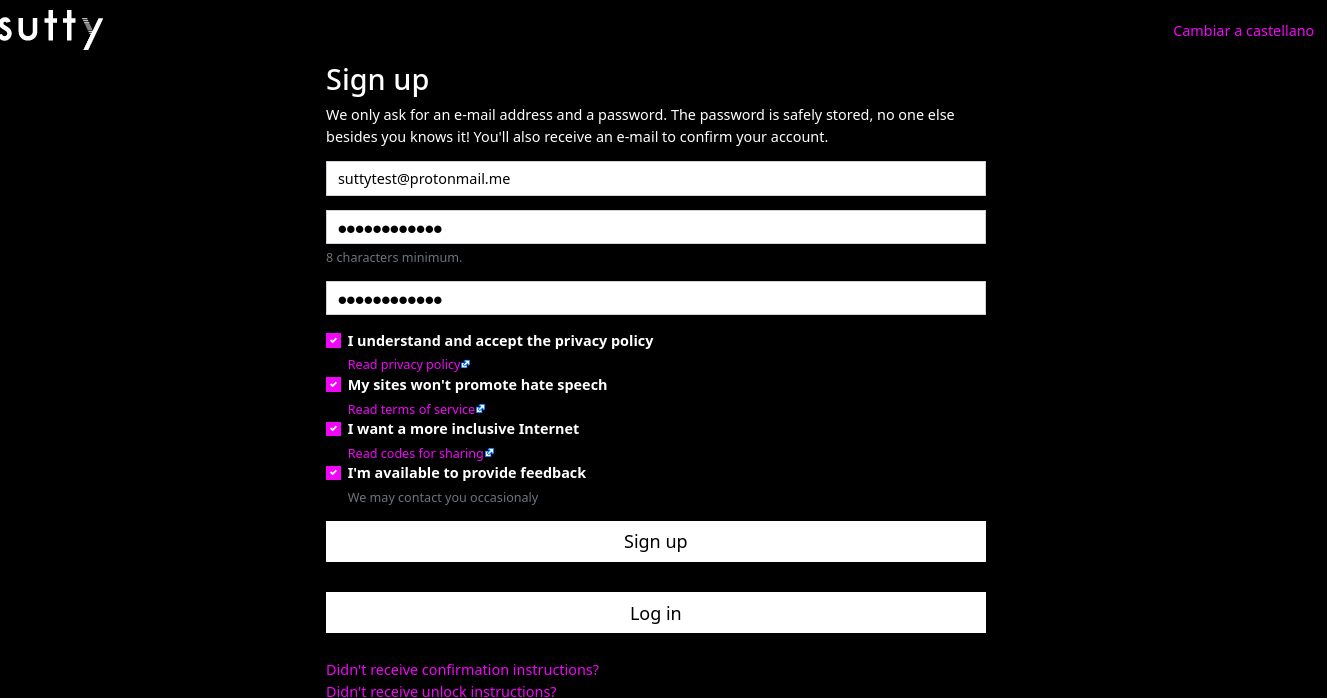
Step 1: Make an account
Visit https://panel.sutty.nl/usuaries/sign_up?change_locale_to=en (opens in a new tab) and enter your email and a secure password. You must also accept Sutty's terms of service in order to create your account.
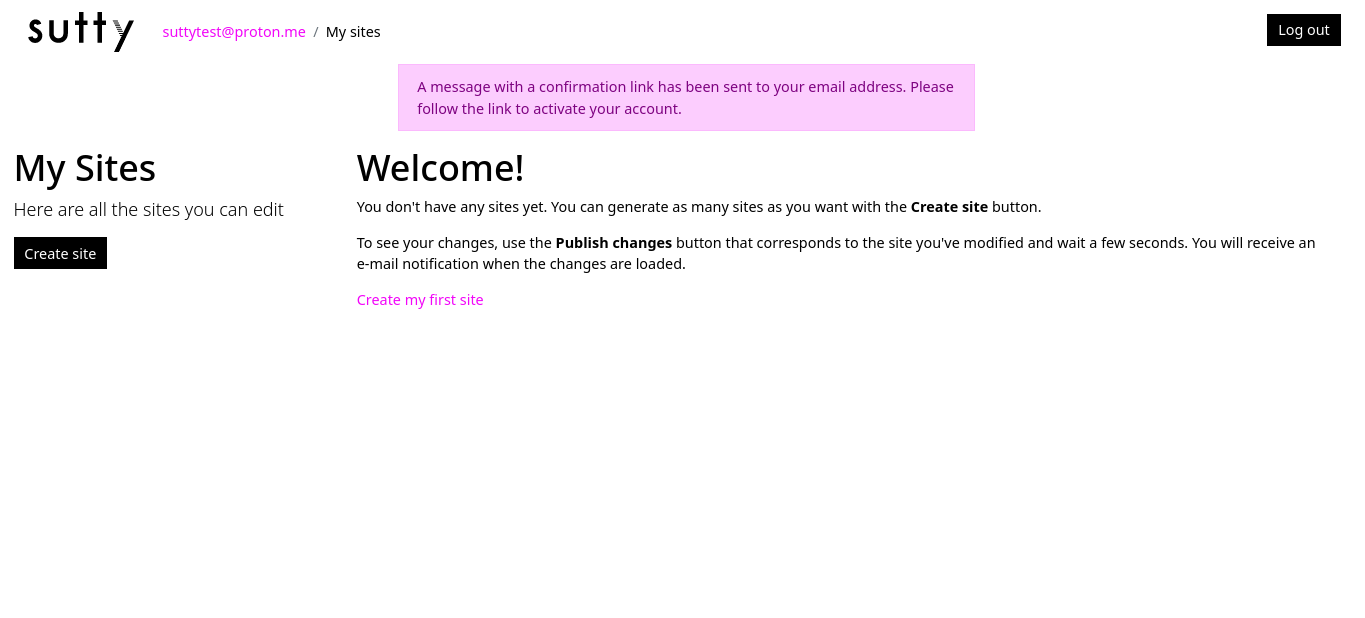
You will then get an email titled "Confirmation instructions" sent to you from noreply@sutty.nl with a confirmation link that looks like https://panel.sutty.nl/usuaries/confirmation/?confirmation_token=example. Visit this link in order to finish setting up your account.
Step 2: Create a site
To create a new site, navigate to https://panel.sutty.nl/sites/new (opens in a new tab) after logging in.
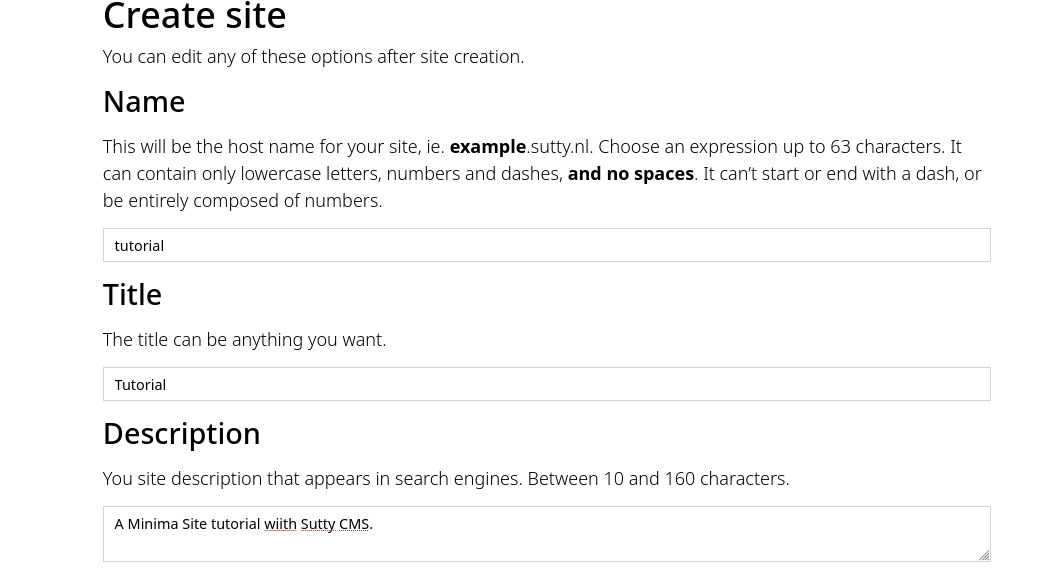
The most important step is to choose a unique name for your site. For this tutorial we will assume the name tutorial. This will be used for your website domain (opens in a new tab). For example, our site will be navigable under "https://tutorial.sutty.nl (opens in a new tab)".
Fill in a title for your website and a description for what your site will contain. For example, "My personal Blog".
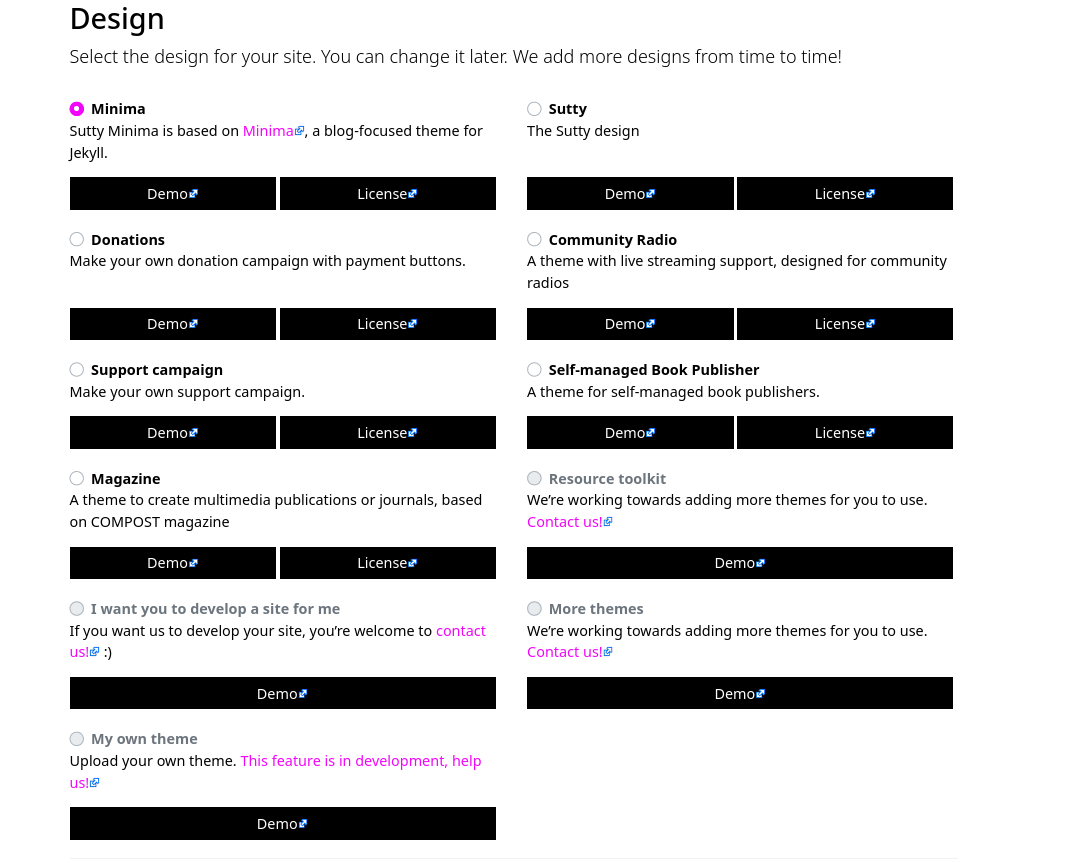
For the Design section, select the Minima theme which is one of the default themes from Jekyll (opens in a new tab).
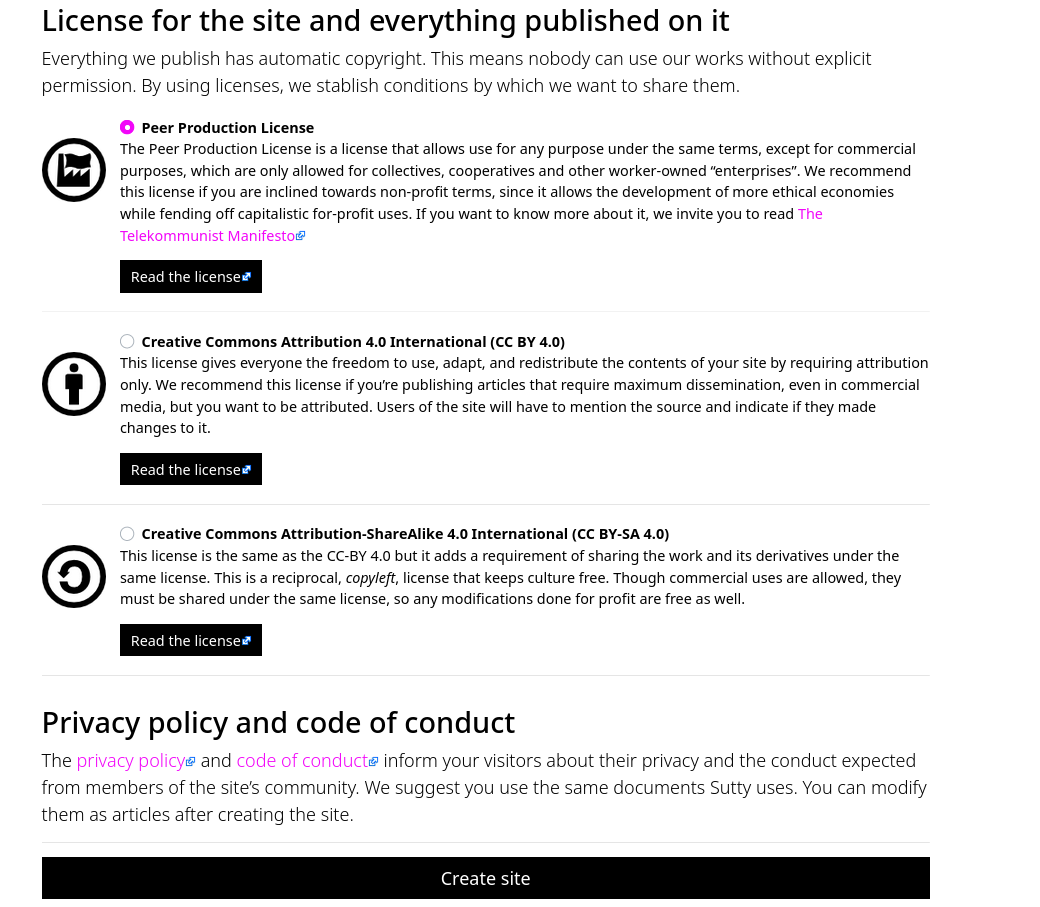
Afterwards, choose a license for your content. If you are unsure about which one to choose, the CC BY-SA 4.0 (Creative Commons Attribution-ShareAlike 4.0 International) (opens in a new tab) is the one which has the most restrictions on what others can do with your website content.
Once you're done, click the Create site button.
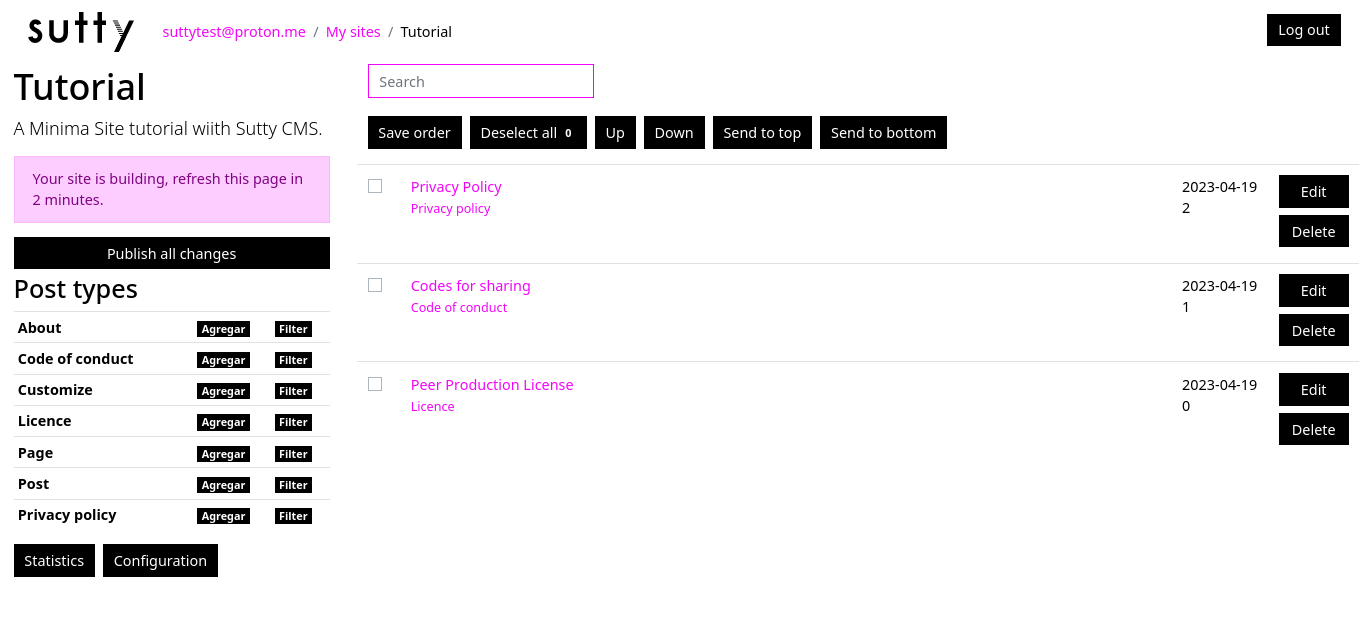
After site creation, you will see a notification bubble in the left panel that will tell you your site is building. This will be up while Sutty is doing the initial compilation and publishing of your site. You do not need to wait for it to finish before making your first post. The bubble itself will not update automatically and you will need to refresh the page periodically, or wait for an email to know when the publication has finished.
Step 3: Enable Distributed.Press
Before adding your first post, you should enable the Distributed.Press integration in the Configuration page which you can get to by pressing the "Configuration" button on the left panel.
You will be redirected to a URL that looks like this: https://panel.sutty.nl/sites/{your site name here}/edit.
From there, scroll down to the section that says Publish to the distributed Web.
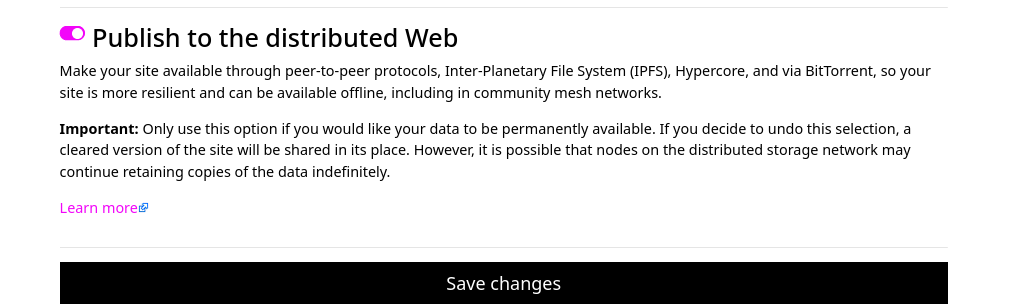
Click the checkbox to turn it on, then navigate to the bottom of the page and hit "Save changes".
This will then navigate you back to your posts list while it enables Distributed.Press behind the scenes.
Step 4: Publish your first post
Once your site is created, you will be automatically redirected to your site's list of posts. The URL should look something like this: https://panel.sutty.nl/sites/{your site name here}/en/posts
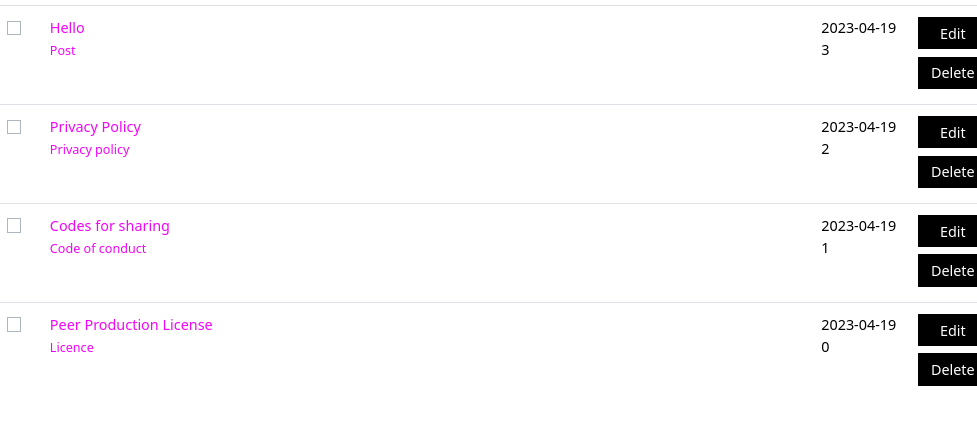
The Minima template comes with some default posts for the site's privacy policy, the code of conduct, and information about the license you used.
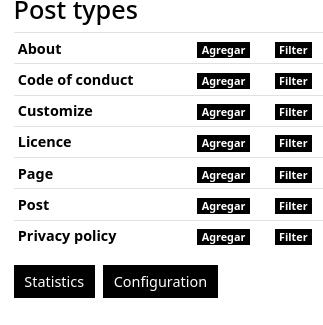
You can see all the types of posts of your site, and add and edit them in the "Post Types" section on the left side of the page.
Click the "Add" button beside the "Post" type to start creating a new post for your site.
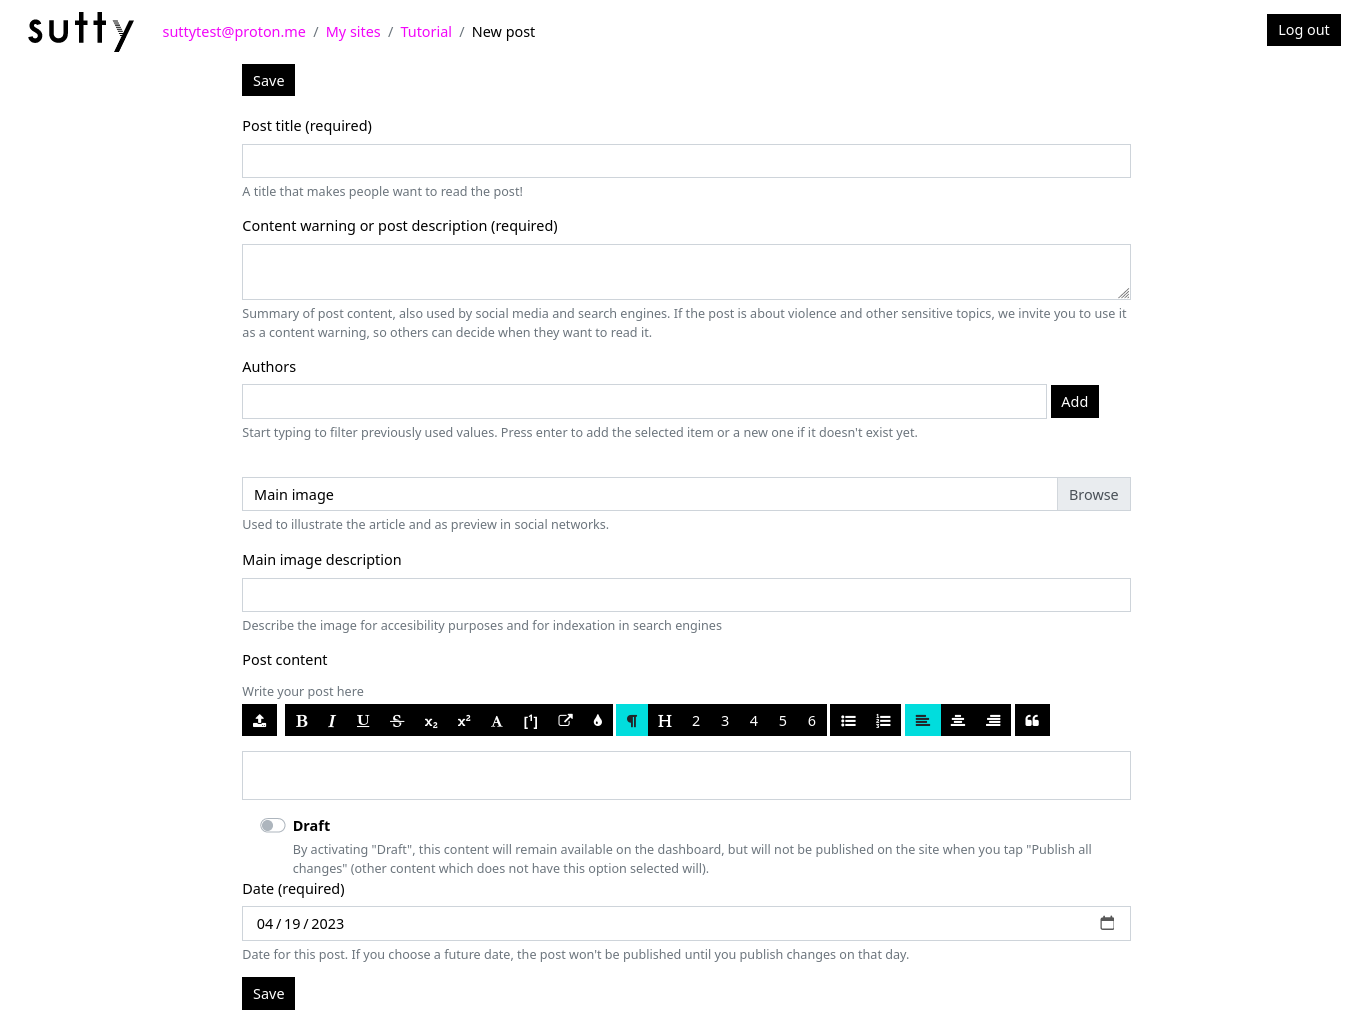
Add a title for your post -- this will be shown on the main page of your site.
From there, you can add a description and optionally attach an image to the top of your post. We'll skip the image part for this tutorial.
The main content of the post will be in the "Post content" section. Sutty has a built-in Rich Text Editor (opens in a new tab) for posts which enables you to format your post into headers, paragraphs, quotes, lists, and inline formatting options like bold text and underlines.
For now, just enter some text or mess around with the contents until you're satisfied.
Once you're ready, hit the "Save" button at the bottom in order to add your post to the site.
After hitting "Save" you will be taken to a page that will show you metadata about your new post.
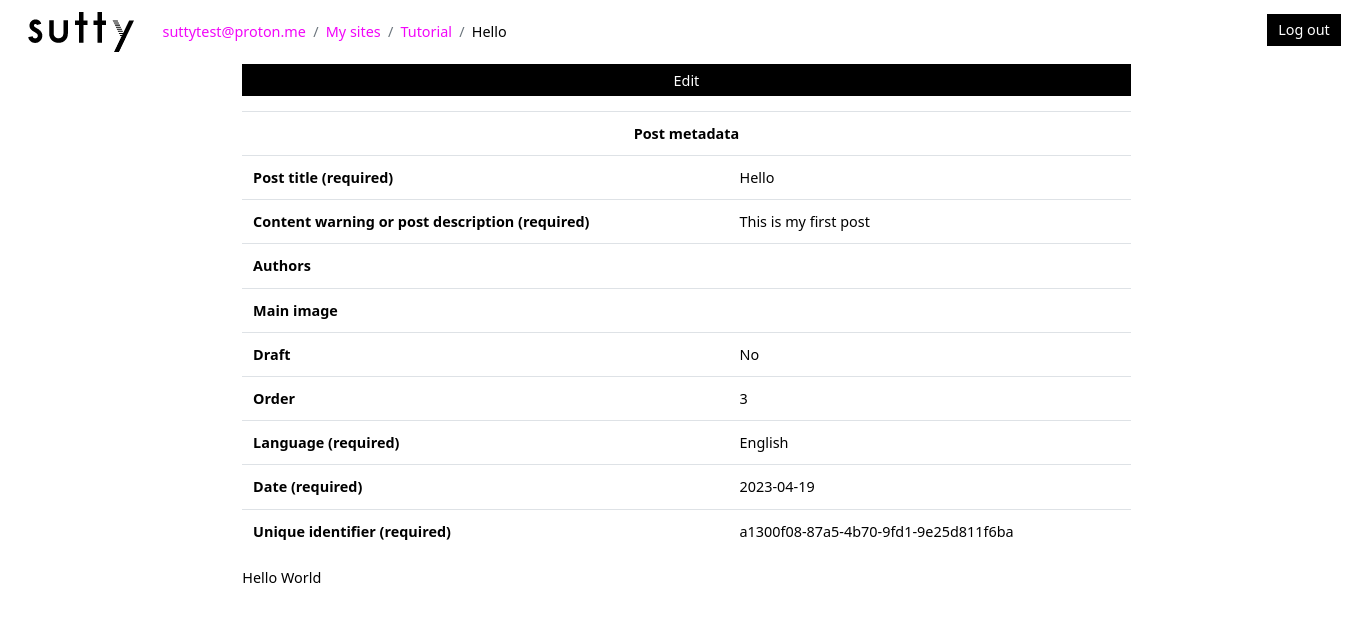
Note that your new post will not be reflected on the site itself until you publish your changes.
To publish your new post, click on your site name in the "Breadcrumbs" navigation at the top of the page to navigate back to your posts page.
Click on "Publish all changes" in order to start a new build of the site. This can take a few minutes to complete, so try refreshing the page after around 3 minutes, or wait until you get an email from Sutty saying that the publishing was successful.
From there, you will be able to navigate to the build statistics page at https://panel.sutty.nl/sites/{your site name}/build_stats to see your list of P2P URLs

You can visit your site by using either the HTTP URL: https://{your site name}.sutty.nl, the IPNS URL: ipns://{your site name}.sutty.nl, or the Hypercore URL: hyper://{your site name}.sutty.nl. There are also raw URLs that use public keys without DNS in the build_stats page.
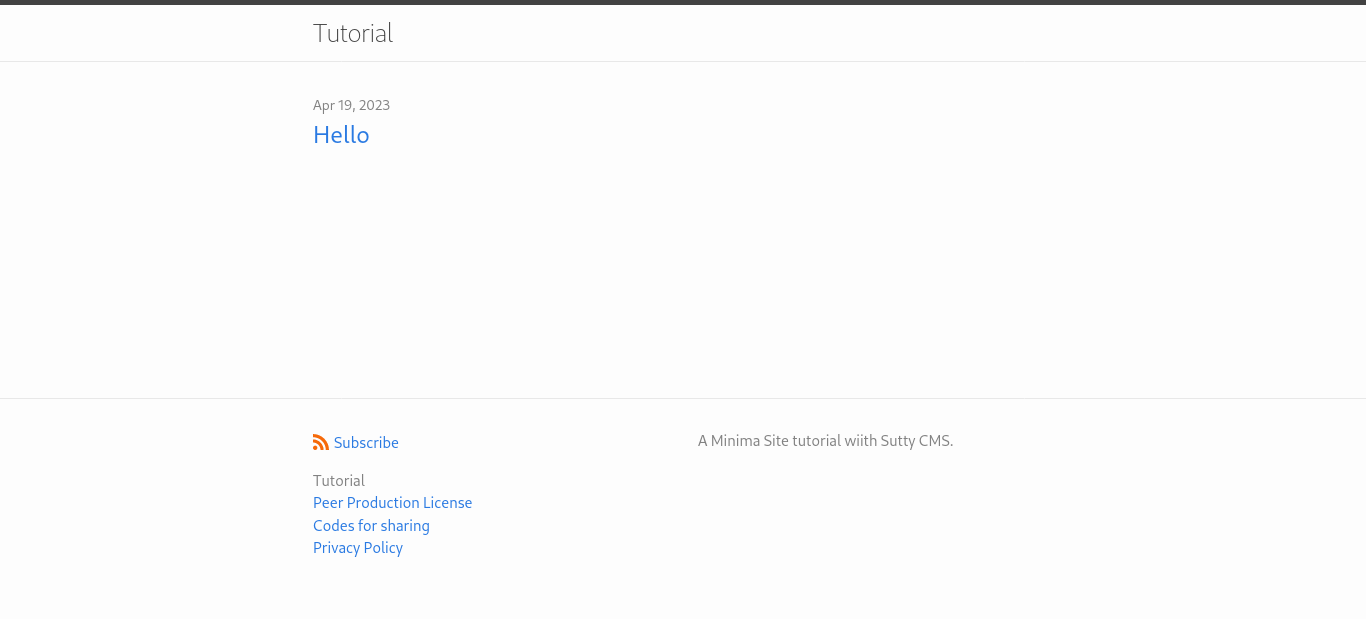
After navigating to one of the URLs, you can click on your new post to view its content.
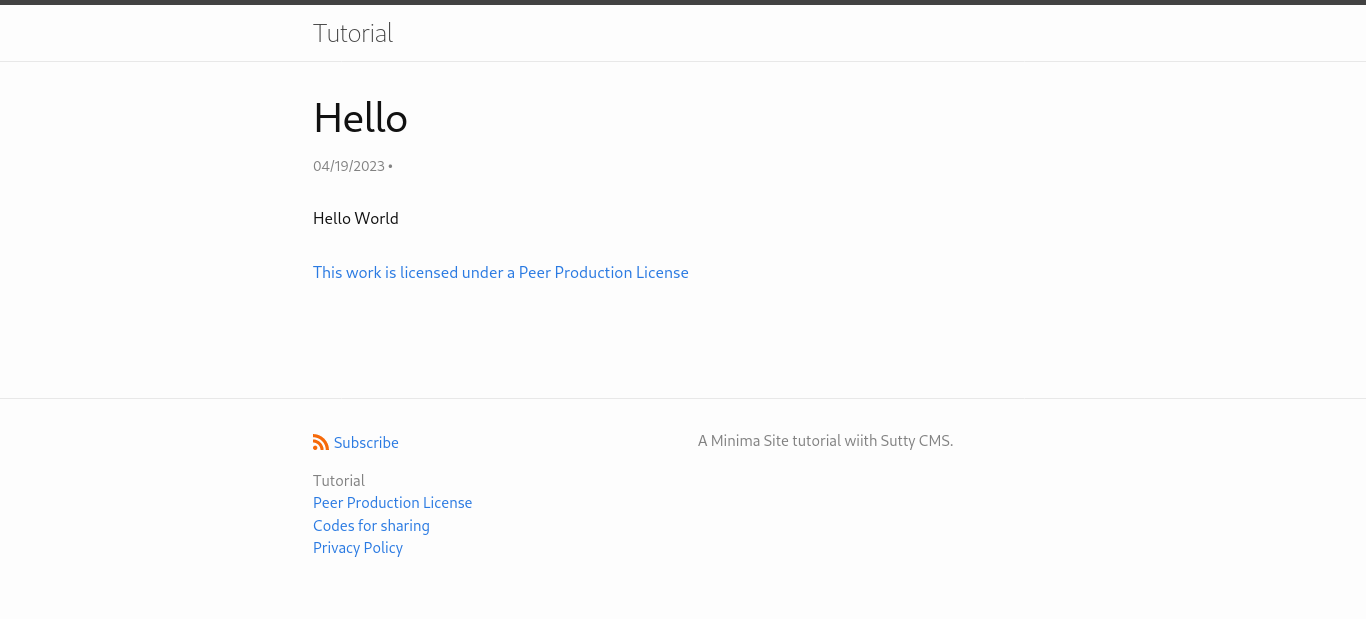
Conclusion
This should give you the gist of how to use the CMS. From here you can add more posts, experiment with modifying other parts of the theme, and try out other formatting options in Sutty's rich text editor. If you'd like help with the panel, or want to create a custom theme, feel free to reach out to Sutty (opens in a new tab) directly.
Thank you for trying it out!